Wandas Basic Sourdough Starter
- Make and maintain your own sourdough starter
- you can make your own.
- you'll need a volume of at least one and 1/3 cups.
- There are several ingredient combinations for making wildshopping list
- yeast sourdough:
- - One is to grate a raw potato. Then add enoughwater to cover
- and enough flour to make a thin batter of about a cup and a
- third in volume.
- - Another method is to use water that you've boiled potatoes
- in instead of the grated potato and watercombination.
- - You can also use flour, sugar and water. Use one cup of
- flour, a tablespoon of sugar and enough water to make a
- pancake consistency batter.
- - Yet another is to simply mix together equal amounts of water
- and flour (whole wheat is best for this).
- Anything that provides food for the yeast and a good growing
- environment will work. yeast needs sugar or carbohydrates
- (which it converts to sugar), and clear liquid.
- Make your choice based on what you have handy and just because
- that's what you'd like to try. Don't worry about whether or
- not one set of ingredients will work better than another,
- because the chances are that they will all be equally
- efficient in attracting wild (sour) yeast. There is no exact
- recipe because there are so many other variables in each house
- that will invite or dissuade wild yeasts from entering the
- mixture. If at first you don't succeed, try, try again. The
- most important thing is the method.
- When you have decided on the ingredients you want, put them in
- a glass container that will hold at least three times the
- volume of the ingredients. Mix lightly with a wooden or
- plastic spoon as some metals will react to it. The working of
- the starter will mix itself.
- Leave the mixture undisturbed and loosely covered with a cloth
- or perforated plastic (to allow gases to escape) at warm room
- temperature until it begins to froth or "work" and expand.
- This is a sign that wild yeasts have made themselves at home
- and that's what you're after. The new starter will rise up in
- the container, then fall again. When it has, it's ready for
- use. (Note: It will smell sour!)
- When you use it, always leave some in the container and add
- flour and water back to equal what you've taken out. Most
- recipes call for a cup of starter, so replace it with a half-
- cup of flour and a half-cup of water and set it in a warm
- place to work again.
- You will probably see a liquid covering the top at one time or
- another. This is called "hooch," and it's exactly what it
- sounds like, but don't drink it! Actually, it's harmless, so
- stir it back into the starter if the starter is thick, or if
- it's thin, just pour the hooch off. It's nothing to worry much
- about either way.
- Keep sourdough in the refrigerator unless you use it at least
- every third day. If you use it that often, you can leave it on
- the counter or any place where it's safe. If you can't
- refrigerate it, you can keep it fresh by throwing out a cup of
- it every second or third day and then replenish withflour and
- water. Wait until it "works" again before counting days.
- A properly cared for starter can live indefinitely, but if you
- leave it out without using it for too long, the yeastcan
- literally suffocate in its own waste products. If the starter
- looks off color (grayish is normal) or turns pink, toss it and
- start fresh.
- What can you make with sourdough? Besides the traditional
- bread, you can make biscuits, pancakes, pretzels,bagels,
- muffins, cornbread and even cookies! Once you're comfortable
- using it, you can experiment with your favoriteyeast or
- baking powder recipes. Simply put, you substitute sourdough
- for leavening and part or all of the liquid.
- The basic recipe for plain sourdough bread:
- 1 cup starter
- 1 Tbsp. of fat (margarine, butter, vegetable oil or olive oil)
- 1 Tbsp. sugar
- 1 tsp. salt
- Enough flour to make a dough that can be handled without
- sticking, but is still pliable
- Knead by hand or machine until it's smooth, then cover and let
- it rise until it's doubled in bulk. This will take longer
- (sometimes over an hour longer) than yeast leavened bread, so
- don't give up and throw it out! Make sure you keep it warm,
- but not hot, while it's rising.
- Again, there is no hard and fast rule because circumstances
- are so variable. Your starter might be more or less robust, or
- thinner or thicker, or your kitchen may be warmer or cooler.
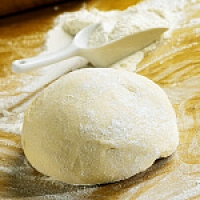
- After it's risen, punch it down and knead enough to remove all
- the bubbles, then form it into a loaf shape and put it in a
- lightly greased bread pan. You can sprinkle a little corn meal
- in the pan and on top of the loaf if you like. Let it rise in
- the pan, then bake at 350 for about 45 minutes.
- Baking sourdough bread is a learned skill and one that takes
- practice, but even if your first loaf doesn't meet your
- expectations, it will be edible. Once you become familiar with
- the process, you can experiment on making just about anything
- that is leavened. Biscuits, cookies, pancakes, cornbread,
- specialty breads and even cakes can be made using sourdough
- starter instead of yeast or baking powder.
- Besides creating incredibly delicious baked goods, you'll save
- a bundle of money over time by not buying yeast!
No comments:
Post a Comment